Affordable Gear List for Top Rope Solo Climbing

Meet the Guide!

Andy is a jack-of-all-adventures, master of none. Depending on the season, you might find him rock climbing, trail running, kayaking, skiing, mountain biking, surfing or good ol’ hiking.

Gear Guide Introduction

Who This Guide Is For:

This guide is for experienced rock climbers already familiar with the fundamentals of single-pitch outdoor rock climbing, such as anchor building, slingcraft, self-rescue, wilderness first aid, belay systems, and rock judgment. 

In this post, I discuss my method for establishing a top rope solo system for easy-to-intermediate rock climbs. Where possible, I follow the advice of gear manufacturers and expert rock climbers. My goal is not to reinvent the wheel, but only to show you a real-life application.

This guide is a personal opinion only! I am a recreational rock climber, not an AMGA-certified mountain guide. You are 100% responsible for your own decisions. Yer gonna die.

Who This Guide Is NOT For:

This is not for new rock climbers! Any type of solo rock climbing, even on a rope, increases your danger by 10x. You no longer have the security of a partner to check your knots, question your logic, or carry you to safety in the event of an accident.

Visual Inspiration

Activity Demonstration

Safety & Risk

What Are the Dangers of This Activity?

Hopefully, it’s obvious that top rope soloing is a dangerous activity. And there’s no way to completely mitigate that risk.

  • The rope could abrade over a sharp edge.
  • A carabiner could cross-load and fracture.
  • The self-belay device[s] may not catch.
  • The anchor could fail.
  • You could fall and land on a ledge.
  • You could twist or break an ankle.
  • You could accidentally forget to engage your devices.
  • You could fall upside down and fall out of the system.
  • You could get stuck mid-route and be unable to escape the belay.

And the list goes on, and on.

You are in charge of your own safety.

I have a saying when I climb alone: “Wait to weight; dress n’ stress.” In other words, carefully weight the rope system on safe ground before climbing or rappelling, and dress and tighten all knots before trusting them.

Here are several rules for safer top rope soloing:

What Is Top Rope Soloing?

No, this isn’t how to become Alex Honnold. Unlike “free soloing,” top rope soloing still requires a rope! But rather than climbing with a partner who dynamically belays you from the anchor of the pitch, you climb alone, ascending a fixed top rope with a self-belay device (or two, as you’ll see).

Top rope soloing is a dangerous activity only recommended for experts. But it’s a pseudo-necessary skill for many rock climbers, especially athletes who can’t find a friend who enjoys time on the rock.

Where to Learn About Top Rope Soloing?

I’ve been top rope soloing for three years. I won’t claim to be an expert, but I take my gear seriously. I’m an avid student of American Mountain Guide Association (AMGA) manuals. You won’t learn how to set up a top rope solo system just by reading this gear guide! You must educate yourself.

Currently, the Bible of top rope soloing is the guide from Petzl. Stop what you’re doing and go read it. 

If you don’t own these books already, I highly recommend:

  • The American Mountain Guide Association Single Pitch Manual
  • The Mountain Guide Manual: The Comprehensive Reference–From Belaying to Rope Systems and Self-Rescue
  • Mountaineering: Freedom of the Hills
  • Down: The Complete Descent Manual for Climbers, Alpinists and Mountaineers

I have also found the pay-by-donation Ebooks at VDiff Climbing to be very helpful.

If you prefer YouTube, check out the Wide Boyz, JB Mountain Skills, and VideoOracles.

My Top Rope Solo System

There are many ways to set up a top rope solo system. Most of them are wrong and dangerous. 

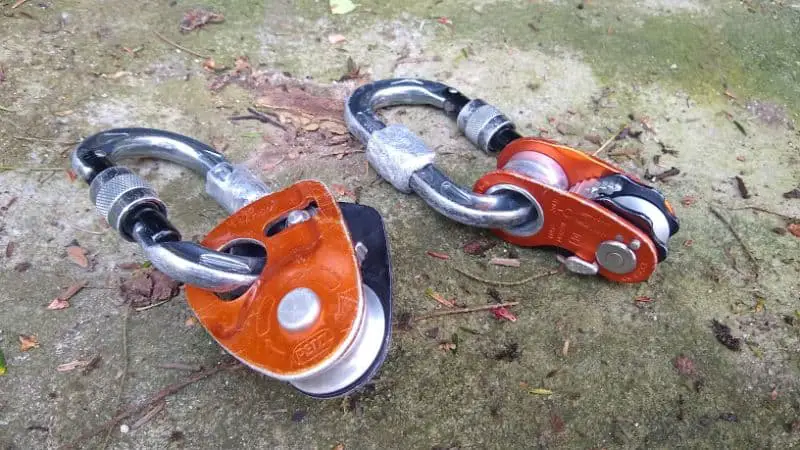
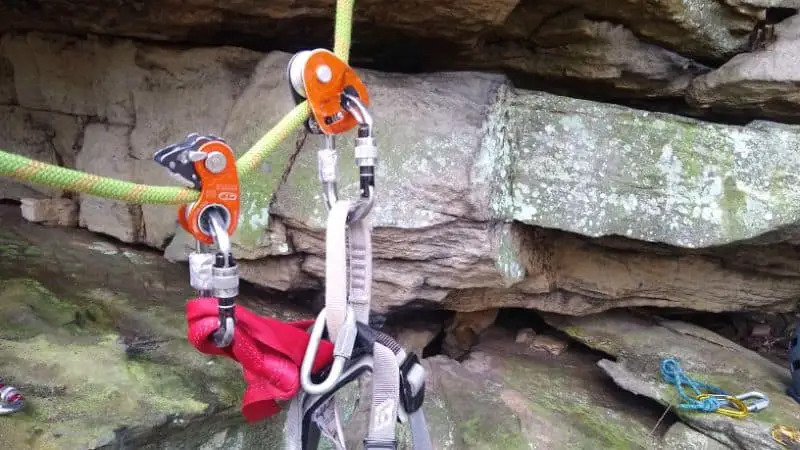
I have adopted the two-devices-on-one-rope method as outlined by Petzl. This is what most other climbers choose, too.

(Technically, the two-devices-on-two ropes method is arguably safer and facilitates easy transitioning to mid-route rappel. But even my 70m rope isn’t long enough to climb many of my chosen routes on a two-rope system. Plus twice the rope management. Plus twice the anchor building. And twice the pack weight. See what I’m saying?)

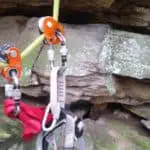
Here is the setup Petzel recommends:

I’ll chat more about gear selection later. For now, I want to highlight a few differences between my system and Petzl’s textbook recommendation:

  1. I use a bungee necklace rather than Torse shoulder straps. A bungee cord tied in a loop with a vice-versa bend maintains tension on the upper device, even on overhangs. And if I take a whipper, a bungee cord won’t break my neck!
  2. For my lower device, I use a C.A.M.P. RollnLock. Unlike most rope clamps, it has pretty high load limits: 5 kN working limit and 20 kN MBS. Like the Micro Traxion, it can be used as a progress-capture pulley or a rope clamp. 
  3. Rather than a locking quick draw through my tie-in points, I added an extra belay loop (a double loop of 1″ climb-spec webbing tied with a water knot). The lower device’s carabiner is snapped onto one belay loop, and the upper device’s carabiner is snapped onto the other. If one breaks, the other will hold. I found this solution to be much more comfortable and versatile than a steel Maillon link through my harness tie-in points.
  4. I use crossload-protected carabiners. Actually, I wrapped a bunch of aluminum foil around the spine, but you could use actual anti-crossloading carabiners. Or Petzl Tanga rubber stoppers.

What About the Top Rope Anchor?

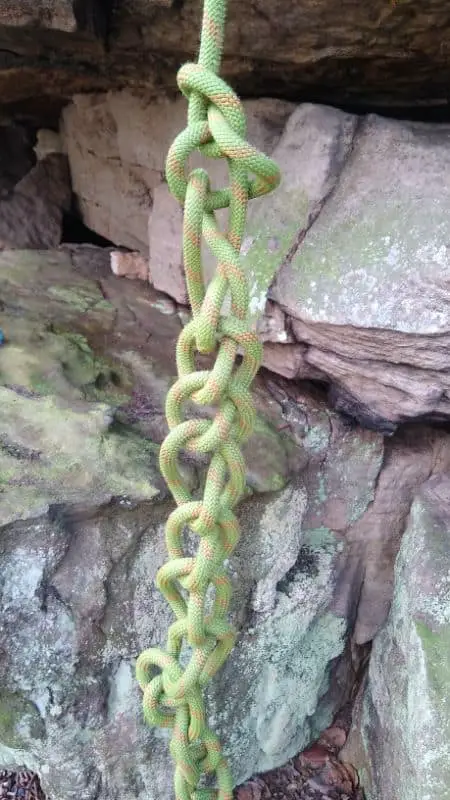
A full discussion of how to build a top rope anchor with a fixed rope is way, waaay outside of the scope of this gear guide! But here’s a hint: My favorite way to fix a top rope line is either:

  • Tying an Overhand/Figure 8 BHK or;
  • Tying a Stoned Figure 8 (that’s a canyoneering knot)

You can untie either knot with tired, worn-out hands, even if you’re wearing gloves.

Either method will result in one or two bights of rope, which can attach to your anchor masterpoint with two locking aluminum carabiners or a single steel locking carabiner.

Affordable Gear List for Top Rope Solo Climbing

Gear List for Top Rope Soloing

EQUIPMENTBRANDSPRICENOTES
Semi-static climbing ropePetzl, Sterling$200EN 1891 Type A Certified
Climbing harnessMany!$75-$150Needs tie-in points, belay loop, gear loops
Primary self-belay devicePetzl, C.A.M.P., etc.$50-$150/deviceSee Gear Notes
Secondary self-belay devicePetzl, C.A.M.P., etc.$50-$150/deviceSee Gear Notes
2x self-belay anti-crossloading carabinersPetzl, Mad Rock, etc.$7-$15/eaSee Gear Notes
Bungee necklaceSold by the foot$0.30/ft6-10 feet
Extra belay loopMetoliusCheap 🙂1” climb-spec tubular webbing
Rappel deviceMany!$30Something easy to lock off
Rappel device locking carabinerPetzl, Mad Rock, etc.$7-$15Recommend round stock spine for longer ‘biner life
120cm SlingMetolius$8-$10Nylon or Dyneema - for mid-route self-rescue
Prusik loopMany/DIYCheap 🙂For mid-route self-rescue

Gear List Explanations & Footnotes

What’s Not On This List

I have not included any anchor building materials. Bring according to your needs! Because many fixed anchors are designed for lead-climbing and are not easily accessible from the top, you may need to rappel down to the anchors to rig the fixed top rope.

Gear Advice

Self-Belay Device

There is NO perfect self-belay device.

As of today, to my knowledge, no manufacturer has developed a device specifically for top rope soloing. All devices have been adapted from other purposes.

Most so-called “top rope self-belay devices” are actually designed as one of the following:

  • Rope grabs and rope clamps (e.g. C.A.M.P. RollnLock)
  • Progress-capture pulleys (e.g. Petzl Micro Traxion)
  • Ascenders (e.g. Trango Passport)
  • Fall arrest devices (e.g. C.A.M.P. Goblin)

The most popular device for top rope solo is probably the Micro Traxion.

Other popular devices include:

  • Petzl Rescucender
  • C.A.M.P. Lift
  • C.A.M.P. RollnLock
  • C.A.M.P. Goblin
  • Kong Duck
  • Kong Backup
  • Wild Country Ropeman
  • Ushba Basic
  • Edelrid Spoc
  • Trango Vergo

This list is relatively short. I suspect someone, somewhere, has tried to adapt every belay/clamp/pulley/fall arrester device that has ever been made for top rope soling.

None of these devices are designed to catch long falls. Regardless of teethed or toothless designs, most will shred, slice or strip the rope at higher forces generated by excessive slack or lead falls (4-6 kN).

(In my experience using a Petzl Micro Traxion as my primary self-belay device, I’ve never observed any rope damage – not even fuzz.)

Some climbers have attempted top rope soloing with the Petzl GriGri or other autoblocking belay devices. These devices do not self-feed; you must intermittently pull slack through the device. In my opinion, this completely defeats the ease and safety of top rope soloing, and I advise you to stay far, far away from it. If you do choose this method, climb at least a grade below your onsight climbing level.

Some people choose to use a Petzl GriGri because it easily converts to a lower (rappel). In my opinion, this convenience doesn’t outweigh the danger of accidentally engaging the GriGri handle. I can convert to an ATC lower in less than 1-2 minutes on a hanging rappel – it just takes practice!

No matter what device you use, ask yourself these questions: 

  • How easily does it slide up the rope?
  • What is the working kN load limit? (3+ required)
  • How easily does the device crossload?
  • Can the device be installed on a weighted rope?
  • Can the device be removed from a weighted rope?
  • Can the device slide down the rope if disengaged?
  • Does the device work on icy or wet ropes?
  • Can the device actually disengage if a button or level is pushed or pulled?

Self-Belay Device Carabiners

The carabiners with which you connect your self-belay devices to your harness should be oval, locking, anti-crossloading carabiners.

  • Oval: Because this classic shape automatically centers and self-adjusts. Offset D-shaped carabiners tend to “pop” loudly when the device re-centers as it’s being loaded.
  • Locking: because these two biners are life-safety critical. Twist-lock ‘biners are best, but screw-locks work well (as long as you remember to screw them shut!) Just remember that screw-locks can work themselves loose if the rope drags over them.
  • Anti-crossloading: Because otherwise it will happen, and it’s terrifying (believe me!). You can purchase dedicated anti-crossloading carabiners (like the Climbing Technology Pillar Pro TGL) or MacGyver your own with Petzl Tanga rubber stops or a few feet of duct tape.

A common mistake is to clip both self-belay devices to your belay loop. This is not redundant! If your belay loop breaks, you

Petzl recommends clipping the upper self-belay device through your tie-in points using a custom quickdraw, as you can see from their drawings. Petzl recommends the quick draw to be made from a nylon dogbone, a steel Maillon Rapide link* (wrenched tight), and an oval locking carabiner.

In a pinch, you can also girth-hitch an 18mm half-length (30cm) sling through your tie-in points and clip into the two end loops. Slings are much more likely to snag and twist compared to a quickdraw, though.

Even though Petzl recommends a steel rapide link, I’ve never seen one used. Tightening and untightening a steel rapide link with a wrench is a pain. You could use a screw-gate, magnetic, or twist-lock carabiner instead, but those could theoretically open from being pushed, prodded or rubbed the wrong way.

My preferred solution is actually to double up my belay loops. My harness has two belay loops (one DIY), so I clip one device to Loop A and one to Loop B.

Top Rope Solo - Rope Choice

Oddly enough, the best rope for top rope soloing using the one-rope-two-devices method is not either of the classic climbing ropes!

Many climbers, including myself, prefer a semi-static rope. Semi-static rope is commonly marketed as caving or canyoneering rope. It is tested to EN 1891 specification.

Why semi-static rope? Unlike a true static rope, it has some shock absorption qualities. These ropes are tested to arrest fairly severe Factor 1 falls. This is critical for when you’re climbing close to your anchor, slip, and shock load the system. Yes, it’ll happen!

Unlike a dynamic climbing rope, however, a semi-static rope doesn’t stretch so obnoxiously far (no more than 5% static elongation at 150 kg/330 lbs).

Top rope soloing with a dynamic rope is no fun. You can drop 5-10 feet at the bottom of a route just from rope stretch, which is super annoying when you’re rehearing a crux move. And dynamic ropes don’t protect the first few moves, where rope stretch would still allow you to bonk into the ground.

Use a burly 9.5-10.5mm rope. You want a rope with a thick sheath for maximum durability against abrasions. Purchase whatever length you prefer.

You should weight the bottom of the rope to facilitate automatic rope feeding. I’ve found that best solution is to tie a Kleimheist prusik with 6mm paracord around the climbing rope and use a snapgate carabiner to connect whatever weight you have – water bottle, rock, pack, etc.

The prusik works best because it’s adjustable. If you tie a hitch or a knot in the climbing rope, you’ll often find that after rope stretch, it’s too low to the ground.

Pro Tip: If you didn’t bring a water bottle, you can weight the bottom of the rope just by making a daisy chain sinnet.