
Andy is a jack-of-all-adventures, master of none. Depending on the season, you might find him rock climbing, trail running, kayaking, skiing, mountain biking, surfing or good ol’ hiking.

This Gear Guide is for sport and trad climbers who are beginning clean aid climbing. It is for climbers who wish to dabble in the sport, NOT become the next Andy Kirkpatrick or Chris McNamara.
This gear guide will allow you to climb many simple, fun aid routes (C1, C2, some C3) without spending tons of money on niche gear.
This guide assumes you will be climbing single-pitch or short multi-pitch clean aid routes within a single day – no overnight bivy, no heavy hauling. Multiday big-wall climbs require exponentially more gear and more experience.
The guide does not cover:
Nor a myriad of the other factors that should be considered in outdoor climbing, like navigation, weather, first aid, etc.
Rock climbing is inherently dangerous. You will risk your life. Aid climbing isn’t necessarily safer because you’re affixed to gear. Placements can rip out; falls of only a few feet can exert major forces!
This guide does not substitute for proper training and experience. This article was originally compiled in good faith but may not have been checked recently for accuracy. Neither the author nor the website can be held liable for any damages or injury. YOU ARE ON YOUR OWN.
In aid climbing, you ascend the rock by hanging your bodyweight off gear placed/wedged/hammered into the rock, rather than free climbing a route with your hands and feet.
Yes, aid climbing is cheating. But it’s still fun! And it’s an important skill for aspiring big wall climbers who may be unable to climb crux pitches.
Here are some other reasons you might want to try out aid climbing:
Clean aid routes (designated by C1, C2 … C6) can be ascended and protected with removable gear like cams, nuts, tri-cams, and hooks.
In comparison, advanced aid routes (designated by A1, A2 … A6) require fixed or semi-permanent hardware like bolts, rivets, pitons, peckers, and copperheads.
Clean aid climbing is a lot of fun. And it’s relatively simple. It doesn’t involve carrying 70 pounds of exotic gear, damaging a rock face, or getting specialty climbing permits. It’s a fun way to log some vertical mileage, even if you’re not in Men’s Health climbing shape.
Best of all, clean aid climbing can be combined with free climbing. Climb what you can; aid the rest. Or try out “French freeing,” (aka goat frogging, pink climbing), which is when you pull on placed gear to get around hard moves.
Clean aid climbing is also a great way to practice your trad skills, since you’re weight-testing every placement!
Aid climbing is a gear junkie’s heroin shot. You don’t need to buy everything, though!
When you’re beginning aid climbing, choosing gear is confusing. Do you need a hammer – or not? Can you get buy with a standard sport climbing harness – or not? What kind of daisy chain should you use – if any?
Plus, the rack for chugging up splitter cracks in Moab, Utah will be vastly different than ascending gritstone boulders in Shawangunk, New York.
Many of the gear recommendations for aid climbing come from professionals who can afford to spend $5,000 on micro cams. However, this Gear List is optimized for the recreational climber who wants affordable, versatile gear good for both trad climbing and aid climbing.
| GEAR DESCRIPTION | SUGGESTIONS | NOTES |
|---|---|---|
| PERSONAL GEAR | ||
| Harness | Metolius Waldo, Yates Shield, Misty Mountain Cadillac | See Gear Notes |
| Helmet | UIAA certified | See Gear Notes |
| Shoes | - | See Gear Notes |
| Clothing | Whatever works for you and your weather. | Visit American Alpine Institute Suggestions |
| Gloves | (Optional) | See Gear Notes |
| CLIMBING EQUIPMENT | ||
| 2x 20-ft Cordelette | DIY: 7mm Prusik cord, tied with double fisherman bend | Cordalette or quad anchor building |
| 1x Belay/Rappel Device | ATC Guide, Petzl GriGri, Edelrid Megal Jul, Petzl Reverso | Suggest guide mode device, plus 30cm sling for rappel extension |
| 1x Rappel Backup | Trango Third Hand, Sterling Hollowblock, Bluewater VT Prusik | Rappel backup should be aramid, not nylon! |
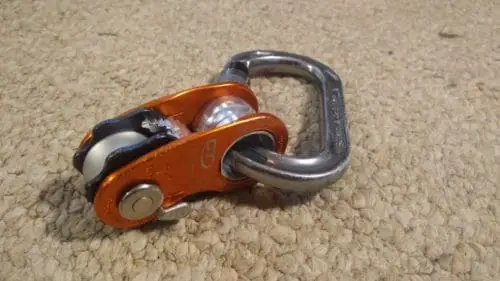
| 1x Emergency Ascender/Progress-Capture Pulley | Petzl Micro Traxion, Edelrid Spoc | See Gear Notes |
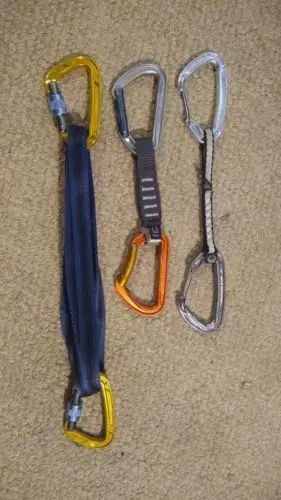
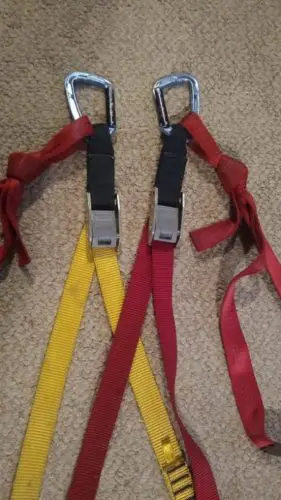
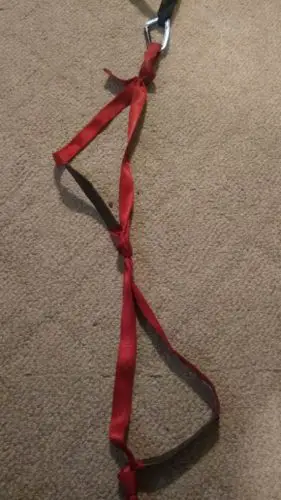
| 2x Aiders | Black Diamond Etrier, Metolius Ladder Aider, DIY | See Gear Notes |
| 2x Daisy Chains | Yates Adjustable Daisies, Metolius Ultimate Daisy | See Gear Notes |
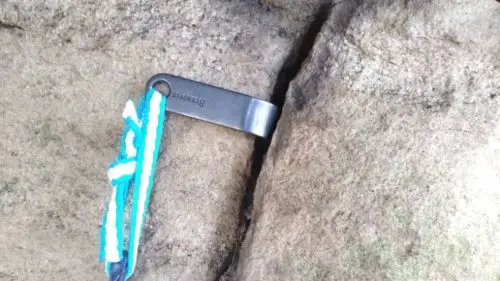
| 1x Fifi Hook | Fifi hook, HMS keylock ‘biner | See Gear Notes |
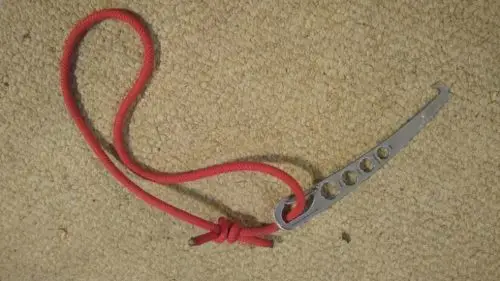
| 1x Nut Tool | Metolius Torque Nut, Wild Country Pro Key | Attach with bungee, spiral, or retractable lanyard |
| 1x Belay/Rappel Carabiner | Mad Rock Ultra Tech HMS Triple Lock | HMS, round stock, screw-gate or triple-lock carabiner. Anti-cross-loading if possible (add Tanga stops) |
| 1x Third Hand Carabiner | Mad Rock Super Tech Screw | Small screwgate carabiner |
| 2x Aider Carabiners | Mad Rock Bottlenose Bent | Medium-to-large, so you can open them with gloves on! |
| 6x Assorted Snapgate Carabiners | Black Diamond LiteWire, Camp Nano 22 | For clipping in, building custom ‘draws and runners, stashing and organizing gear, redirect ‘biners, etc. |
| 6x Assorted Locking Carabiners | Mad Rock Super Screw Tech, Mad Rock Oval Screw Tech | For anchor building, “stoning” knots, etc. |
| 10x Alpine Quickdraws | Carabiners of your choice, 60cm nylon slings | Up to half can be substituted with sport quickdraws |
| 4x Double Length Slings | 120cm Nylon 18mm Metolius Slings | Useful for gear slings, Magic X anchors, prusik foot loops, rappel extensions, chickenhead girth hitch anchors, quickdraw runners, etc. |
| PROTECTION | ||
| 2x Set of Standard Cams | Black Diamond Camalot C4, Wild Country Friends | Classic cams! Each with snapgate carabiners |
| 1x Stopper Nuts | Black Diamond Stopper #1-#13, Wild Country Rocks #1-#10 | Classic nuts! Arranged on two snapgate carabiners |
| 1x Offset Nuts | DMM Offsets+Peanuts | Useful for flaring cracks and funky placements. Arranged on two snapgate carabiners. |
| 1x Tri Cams | C.A.M.P. Tri Cam EVO, 6-piece | Useful for pockets, horizontal cracks, some flaring cracks. Each with a snapgate carabiner. |
| 1x “Thin-Crack Protection” | See Gear Notes | See Gear Notes |
| PROGRESSION | ||
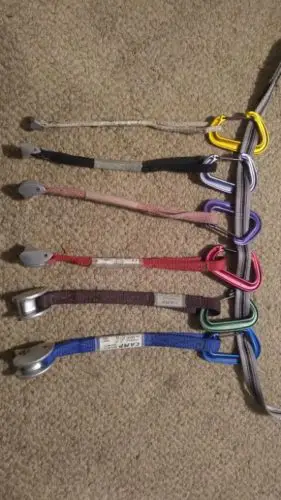
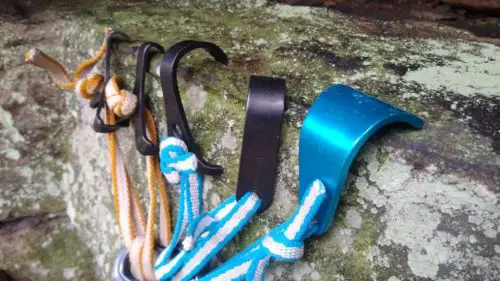
| 2x Skyhooks | Black Diamond Talon, Black Diamond Cliffhanger | See Protection vs Progression Notes |
| 2x Cam Hooks | Moses Cam Hooks (aka Leeper hooks) | See Protection vs Progression Notes |
In regular trad climbing, every piece (or cluster of pieces) should be placed as protection: If you fall, the piece[s] should arrest your fall and keep you alive.
Aid climbing doesn’t always work that way. Some aid pieces or placements cannot, by design or by placement, hold a lead fall. They are bodyweight progressive placements only. If you fall on them, they will likely break, fall out, or rip out. Most hooks, for instance, are progression pieces only, since they tend to fall out when repeatedly weighted and unweighted.
I would argue that most of us casual climbers dabbling in the dark art of aid climbing should try to avoid progression-only hardware. I do keep some hooks to eke past a few feet of blank face climbing or paper-thin splitter cracks, but if the going gets too tough, I get going!
With that said, I firmly stand by my small stock of hooks: Moses cam hooks and Black Diamond talons. Having two of each kind of hook is critical, as it allows you to “leapfrog” or “shuffle” by back cleaning each piece. With Black Diamond talon hooks, I can ascend 5.13 face climbs that otherwise would shut me (and my gear) down completely.
Once a crack narrows to 1/2” width or less, you face a whirlwind of gear options: C.A.M.P. Ball Nuts, Wild Country Zeros, DMM Brass Offset micro nuts, Peckers and Tomahawks, etc. And that’s just the removable gear options!
Just as there’s no one-size-fits-all gear, there’s no one-size-fits-all answer.
And so the circle continues. As a recreational aid climber, most of this discussion becomes academic. Almost all micro aid gear is incredibly sensitive to rock type and placement skill. You have to learn what works for your skill level, your type of rock, your weather conditions, your budget, and your risk level.
Personally, if I can’t climb the rock with cam hooks and/or my #1 BD nut, I’m going elsewhere. I hate cleaning brass nuts almost as much as I hate spending $20 on their replacements. I’d rather spend my time climbing, not cursing and yanking on a steel cable.
I’m a fan of the classic 2 aider + 2 daisy chain system.
Me being a cheapskate, I started off with hand-knotted daisy chains and an oversized HMS carabiner. That lasted exactly one outing. It was awful. An HMS carabiner, even with a wide gate, makes a very poor substitute for a fifi hook.
So I debated spending $20 on a fifi hook or $50 on adjustable Yates daisies, which were extremely well-reviewed. I spent the $50 on the adjustable Yates daisy chains, and I’ve never looked back.
That’s just my 2 cents. Climbers with thousands more hours of experience than me prefer ye olde daisy chains plus fifi hook. So your mileage may vary.
The one downside to the Yates is you lose several valuable inches (~6) because of the extra hardware. So for when I need those extra inches, I still keep a big ol’ biner on my Harness as an emergency pseudo-fifi hook, which I can clip directly into the placement.
You also need to stop the daisy webbing from twisting; otherwise, they’re difficult to extend and pull tight.
Personally, I would never climb without daisy chains. I’m a bit of a butterfingers, and I just know I’d drop an aider at the worst possible time.
I can also use my Yates daisies as a tether or PAS when clipping into anchors (although I always tie a catastrophe knot in the rope, just in case).
Almost no daisy, not even a Yates (rated for ~5 kN when new), is designed for the shock of lead falls. That’s why it’s so important to minimize slack in your daisies!
I tried to make my own dynamic daisies out of old climbing rope, but the experiment was a failure. The daisies were bulky, heavy, and cumbersome. And the stretchiness of the climbing rope would always close the loops under strain, making it almost impossible to clip in.
Metolius makes dynamic webbing loop chains like the Ultimate Daisy, but as I said, I opted to go for the Yates adjustable webbing daisies instead. I was tired of faffing around (as the Brits would say) with daisy chain loops.
Plus, the Yates are rated for 4-5 kN, which is about the maximum force generated by any normal fall in roped lead climbing. Many C2 placements are much more likely to rip out or break before the Yates daisies will!
You never know when you’ll have to ascend a rope. Always come prepared.
If you’re into jumaring, then you’ll need a handled ascender like the Petzl Ascension.
Personally, my favorite emergency ascending device is the Petzl Micro Traxion, technically a progress-capture pulley (PCP). I can also use it as a top rope self-belay device. In a pinch, you can use a rope clamp like the Wild Country Ropeman, Kong Duck, Camp RollnLock, etc. But rope clamps are typically rated to much lower force ratings.
In an emergency, you could always use prusik loops to ascend, but that’s slooooow going.

If you can afford it, buy ladder-style step-aiders with a spreader bar. These are by far the easiest to use, and do actually feel kinda like walking up a ladder!
Otherwise, you make your own classic etriers out of 1” climb-spec webbing.
Almost any regular climbing harness will do, except for ultralight alpine or gym harnesses without a belay loop or gear loops. Your harness should, at a minimum, have four gear loops and a belay loop. The more padding, the better.
I have found that having two belay loops is very useful, especially when soloing an aid climbing on top rope. With two daisy chains, fifi hook, a self-belay device and a rappel device, a single belay loop gets too congested.
You can make your own belay loop by tying a double loop with 1-inch tubular climb-spec webbing. Thread the webbing through your tie points and finish it off with a water knot (keep 2-4 inch tails!) Use this belay loop ONLY for your daisy chains, not your attachment to the climbing rope! And double-check the tail lengths before every climb; water knots are infamous for loosening under cyclical loading.
If you need a full-strength haul loop on your harness and don’t have one, just improvise a loop out of prusik cord or ⅝” webbing.
Cam hooks are an aid climber’s secret weapon! You can leapfrog enormous sections of cracks from 1/8″ to 1″ wide, placing regular gear protection as you go. Get the Regular, Wide, or Fragile Flake (Extra Wide) sizes, since you can use them in inverted placements.
Bring a climbing helmet. ‘Nuff said. If you don’t have a climbing helmet, at least go get a skateboarding or bike helmet, anything to protect your cranium.
In big wall aid climbing, a 10-11mm rope is recommended to handle the abuse of jumaring and hauling. But for recreational aid climbing, any UIAA-certified dynamic climbing rope will do.
You don’t want to wear your latest Scarpa bouldering shoes to an aid climbing route! You spend A LOT of time standing in your aiders. Regular sport climbing shoes are just torture.
On the other hand, you’d be amazed what kind of damage a single aid climb can do to regular shoes, especially if you alternate free climbing and aid climbing.
If your only goal is aid climbing, bring along some heavy-duty leather work boots. These will stand up to the abuse, and they’ll keep your feet comfortable.
Otherwise, wear climbing approach shoes or a good pair of hiking shoes (not boots!) with sticky, semi-rigid soles. Protect the toe against scrapes with thick duct tape.
I, not being a Yosemite climber, did not splurge on a dedicated pair of aid climbing gloves. You can, if you want. Or you can use your regular belay gloves. Or you can completely forego gloves.
Because I typically combine aid climbing with free climbing, I bought a $10 pair of fingerless work gloves, and I love ‘em. They do triple-duty as crack climbing gloves, belay gloves, and aid climbing gloves.
Copyright 2021 – Adventure on the Cheap (SRVS)
