
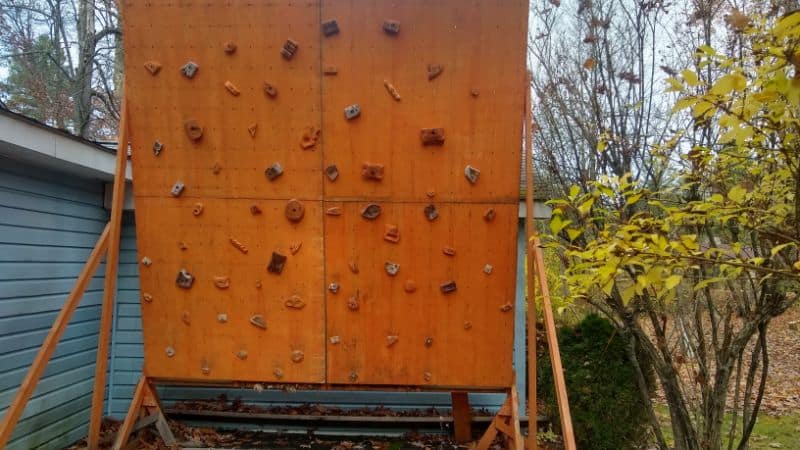
Two years ago, I built a 10×10 rock climbing wall. My budget: $200. I built the frame structure out of 2×4’s and the panels out of plywood-foam composite panels, but the holds stopped me cold.
You can buy climbing holds in bulk from brands like Atomic, Metolius, Escape, or Rock Candy. Most brands will sell their factory seconds in bulk in a hodgepodge of sizes and colors. The seconds are 100% functional but usually downgraded for cosmetic reasons. In my experience, they’re normally sold for about 25% off.
However, most seconds are smaller holds, like footholds and crimps. Hard to find two-handed jugs and wide pinch blocks, let alone volumes! And even factory seconds cost $4-8 per handhold and $2-$4 per foothold. The math wasn’t in my favor.
Can You Use DIY Wooden Climbing Holds?
Climbers already use wooden holds for campus boards and training ladders. With one special tool (that I’ll tell you about later) and a little ingenuity, you can create wooden holds of almost any size and shape.
Most commercial wooden climbing holds are smooth, simple blocks and domes. I wanted something more intricate and demanding. And while you can find some ahh-mazing hardwood rock climbing holds on Etsy, they cost $5-15 per hold!
So I set out to make my own.
How Many Rock Climbing Holds Do I Need For a Wall?
First, how many climbing holds will you need?
As many as you can fit, of course! But at a minimum, you should aim for one climbing hold per square foot. So that’s 32 climbing holds for a 4×8 sheet. In my case, with a 10×10 wall, I needed 100 holds.
A mixture of 30% footholds and 60% handholds worked well for me. The bottom of your wall will be almost completely covered in footholds except for sit-start boulder problems, whereas the top of your wall will be covered only in handholds.
Do I Need a Climbing Hold for each T-Nut?
No, you don’t need a climbing hold for each T-nut. This would be called a “spray wall.” And while spray walls are great for improvising problems and climbing laps, they aren’t necessary for a home gym.
In fact, there isn’t one set pattern for a T-nut layout. Here’s a helpful article from Atomik on rock climbing T-nut layouts.
- The standard is the 72 T-nut layout, which is 8” vertical spacing and 6” horizontal spacing, with the columns staggered.
- All Moonboards have a 7-⅞” rectangular spacing both vertical and horizontal.
Personally, I did a 6-inch square T-nut layout. But that was a mistake, I think. I can’t place two larger holds next to each other. If I would have staggered the columns or increased the vertical spacing to 8”, I would have better route-setting options.
Or … don’t use T-nuts at all. If you’re going for the cheapest possible wall, just screw everything directly to the wall with two #10 deck screws.
Wooden Climbing Holds Vs Plastic Vs Stone
There are several materials used in rock climbing holds:
- Plastic (resin)
- Natural stone
- Wood
- Concrete
If you’re a DIYer, you can find plenty of tutorials on how to make your own resin holds or natural stone holds. Personally, I wasn’t interested in spending weeks chipping away at backyard granite or making clay molds to cast my own resin. So my best option was my only option: wooden climbing holds.
Hardcore climbers will tell you that wooden holds are better for training because they save your skin. I can’t attest to that, as I’m not a hardcore gym climber. But wooden holds are slippery by nature. You must rely more on grip strength than friction.
How to Make Wooden Climbing Holds
What NOT To Do!
- Don’t hand-shape the holds with a chisel and planer
- Don’t sand down the holds with an angle grinder and a flapper disc
- Don’t use a hacksaw and a keyhole saw.
(Ask me how I know these things.)
Your Secret Weapon: A Carving Disc
If you own woodshop equipment like a lathe and a bandsaw, then you can create any shape you can imagine! As for me, I did not own either of those machines. I had conventional construction tools: a table saw, miter saw, power drill, and an angle grinder.
After some research, I discovered my secret weapon: a wood carving disc. These tungsten carbide carving discs look like flattened pincushions. Here’s a picture of mine:
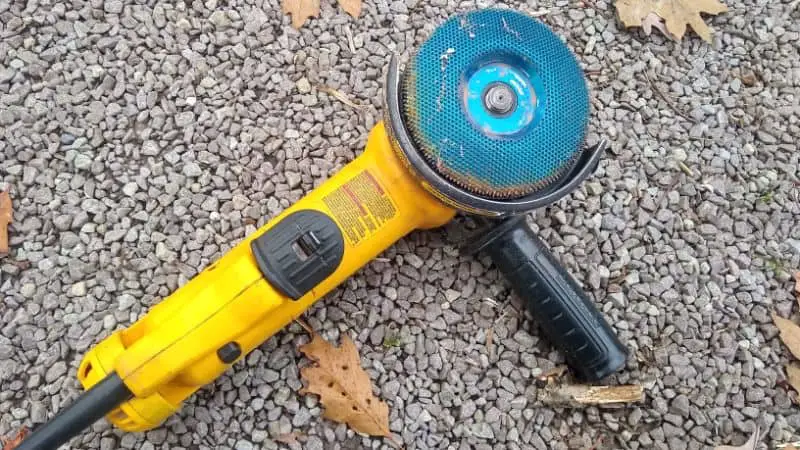
You attach one to a standard 4.5-inch angle grinder with a ⅞” bore. They’re omnidirectional, so you can grind at any angle or orientation. There are two big manufacturers: King Arthur and Kutzall. Mine is a Kutzall.
Guys … when I first attacked a 2×4 with this thing, my jaw dropped. The 2×4 disappeared in a blizzard of sawdust. The tungsten teeth ate the pine like a mini chainsaw. Out from the wood emerged a beautiful shallow scoop just waiting to become a mini jug. I felt like Michelangelo but covered in sawdust.
Where to Get Wood for Climbing Holds?
Good wood makes good holds. And unfortunately, most of the good, dense hardwoods at your local home improvement store – hickory, oak, mahogany – have already been planed and finished as ¾” planks. You’ll need to look outside the box.
You want dense, heavy hardwood: oak, mahogany, hard maple, ipe, teak, etc. These are the kinds of woods used for heirloom furniture, structural columns, and decking.
I recommend contacting your local cabinet shop and asking for drops. Cabinet shops will order rough sawn 4/4, 6/4, and 8/4 lumber. Waste from each board is called a “drop,” and they range from 4 to 12 inches in length, usually – the perfect size for climbing holds!
Do not resort to cheap wood. Any holds I made with 2×4 SPF lumber split within a few months. Fast-growing softwoods like pine, hemlock, and fir aren’t dense enough to survive the rigors of a climbing wall.*
*The only exception I would make is for campus rungs, which can be made from 1×2 softwood lumber.
How to Carve a Wooden Climbing Hold
So, with your angle grinder and shaping disc in hand, you can let your creativity fly! Just a few notes beforehand:
- Don’t forget your PPE! You’ll be enveloped in clouds of sawdust and using high-speed tools, so use an approved mask and wear safety glasses.
- Use a saw (table or miter saw if you have it) to roughly shape the block of wood before you begin carving.
- You’ll need a vice or clamp to hold the block while you’re carving. Personally, I drilled the ⅜” hole for the machine screw first, and then I attached the hold-to-be to a disposable wooden post anchored in a vice. Worked like a charm.
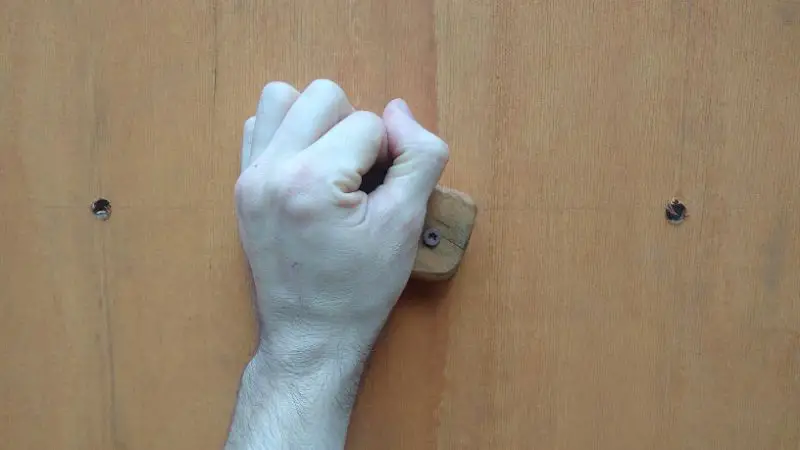
Footholds
During my online research, I heard a piece of wisdom about footholds: Make them as small as you can. I took that to heart and made most of my footholds out of ¼” and ⅛” thick plywood. These plywood pieces can be screwed into the wall instead of bolted.
I also made dome-shaped sloper footholds that shed anything less than a perfect foot placement. Great for balance work!
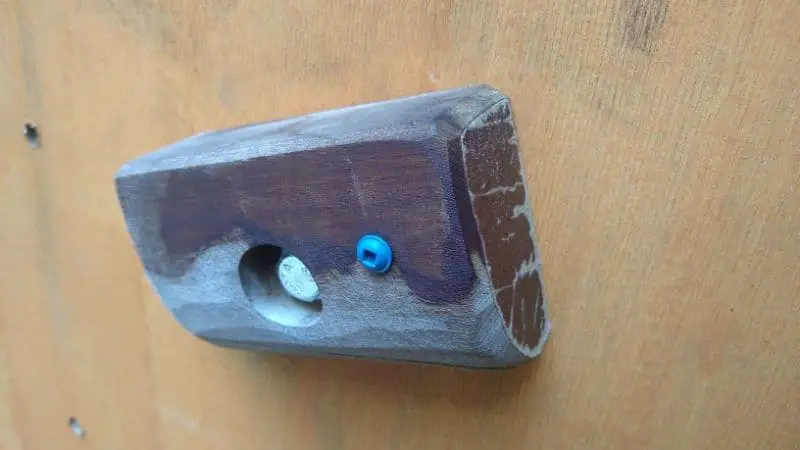
Crimps
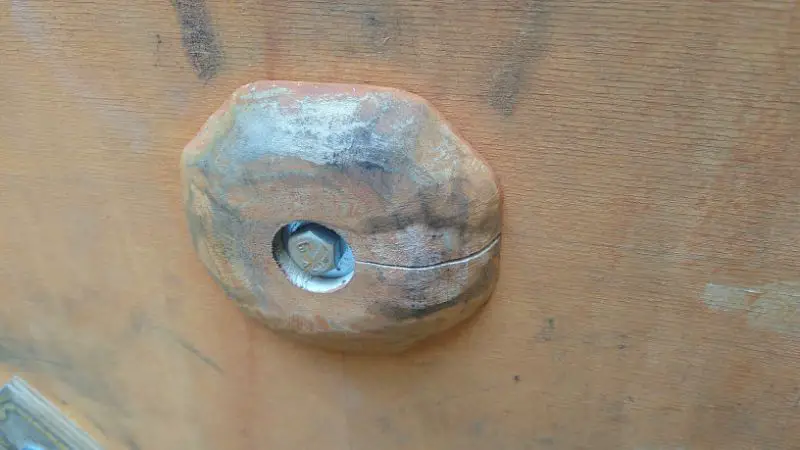
Micro crimps can be made the same as tiny footholds using ⅛” and ¼” plywood. You can bevel an edge to create an easier or harder crimp. Larger crimps, like the one shown above, are easily made from 3/4″ thick plywood or hardwood boards.
Ledges
Ledges are easy to create with wooden boards! Ease those edges to keep your tendons safe.
Slopers
Here’s a pro tip for carving slopers: If you can, run your wooden blocks through a table saw or miter saw first, creating a bevel. That will speed up the carving process.
Pinches
Pinches are also easy to create with wooden boards! Use a variety of plank widths to create narrow, medium, and wide pinches. Then use the wooden carving disc to rough up the edges, add some thumb grabs, etc.
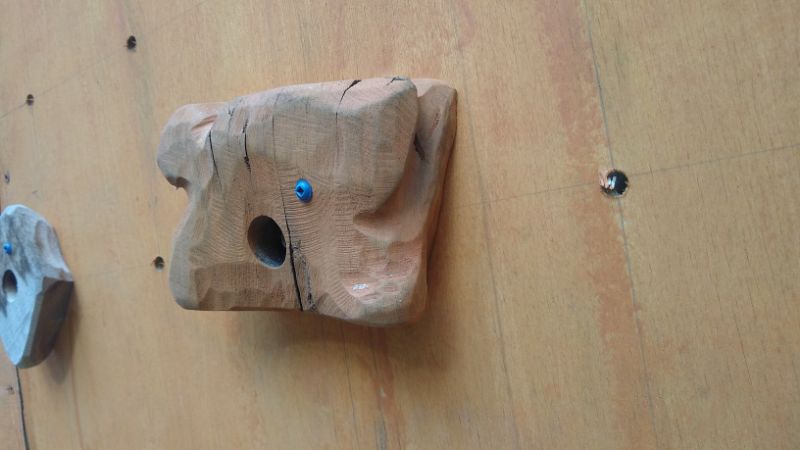
Pockets
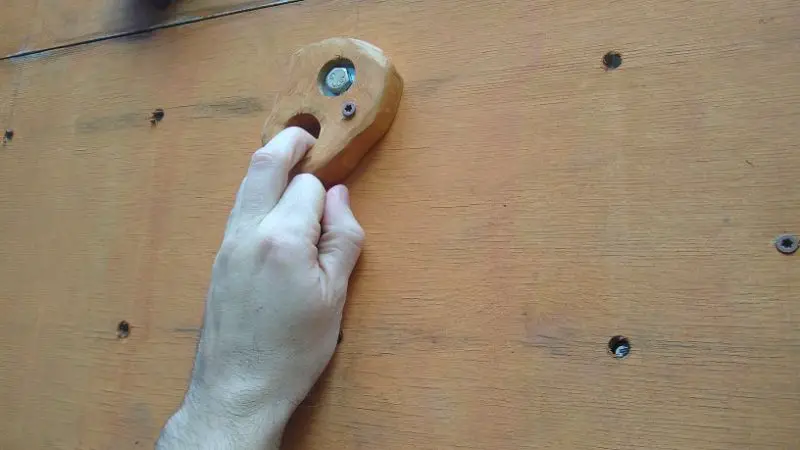
With a power drill and a set of hole saws or spade bits, you can easily create pockets of any size. If you want to get fancy, you can even use Forstner bits to create partial-depth pockets.
I did encounter a problem with drilling pockets, though. The sides are too straight. It’s hard to ease the edges without hand-sanding or hand-routing. And those straight sides can be dangerous to your tendons.
Flakes
I didn’t try to make a flake. If I was to attempt it, I think I would screw a ½” plywood strip to the wall as a spacer first. Then you’d have enough space between the hold and the wall to sink your fingers in for a layback.
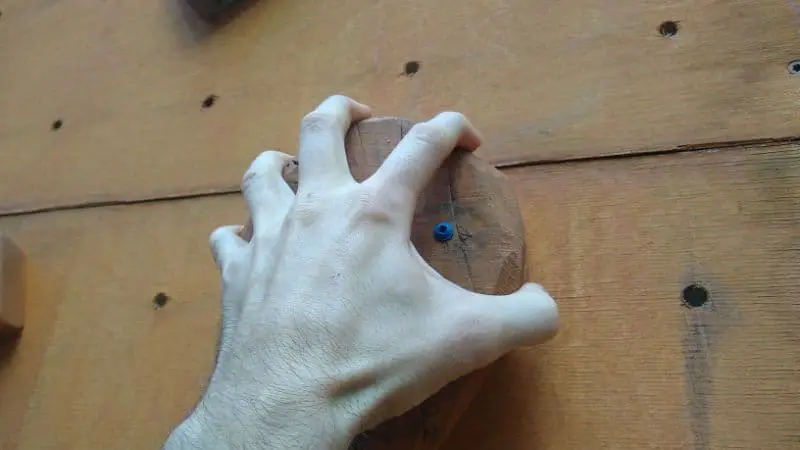
Jugs & Horns
Everyone loves holding onto a jug! I found the best jugs were made with 6/4 or 8/4 lumber, which is meaty enough to carve a full dish or scoop shape. You can also try laminating thinner pieces of wood. Glue the planks together with wood glue and clamp for 24 hours before carving.
Do You Need to Finish Wooden Climbing Holds?
Yes, wooden climbing holds should be finished. If you want, you can apply a deck and siding stain as your preferred color. Then you should use an exterior-rated polyurethane spray and reapply every year.
In my case, I got lazy, and I didn’t finish all my climbing holds. Anything I didn’t finish is starting to crack after two years on the wall.
To be honest … wooden climbing holds are best for indoor walls. I made mine for exterior use, but I’m well aware that they won’t last as long as commercial plastic holds. For me, the cost $avings were worth it. Plus, I liked carving my own crazy designs.
Thankfully, each hold only cost me about 10 cents, so there’s plenty more to go around!
