
Rock scrambling is often defined as the gray area between hiking and climbing, where the route doesn’t require a rope but a fall could be fatal. In the U.S. YDS climbing system, scrambling falls somewhere between a hard Class 2 and an easy Class 5, but beware! – one man’s scramble is another man’s solo.
But rock scrambling is more than the Demilitarized Zone between rock climbing and hiking. It is a discipline unto itself. Many practitioners enjoy scrambling because of the “flow state:” total immersion, physical fluidity, beyond distraction. I’ve been lucky enough to scramble classic routes like Kit Carson Peak, the Trap Dike, Grandfather Mountain, Mt. Olympus – and more on the way!
Oh, and you’ll also need quads of steel bands, calves of hard rubber, and sticky approach shoes.
What Is Rock Scrambling?

Rock scrambling is ascending semi-vertical terrain using your feet for progression and your hands primarily for balance.
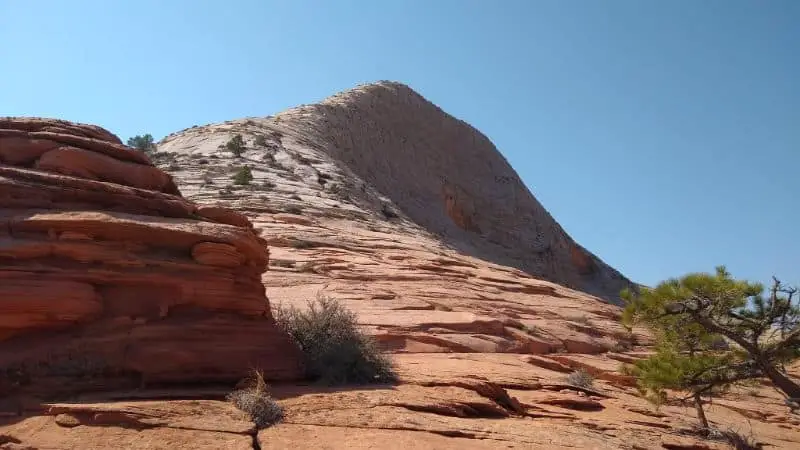
In the U.S., scrambling is most associated with slab, slickrock and slide hiking. It normally involves exposed alpine or desert terrain, big fall potential, committing approach hikes, and excellent route-finding.
Don’t beat your head against the wall discussing the semantics of hiking vs scrambling vs climbing. It’s all subjective. Personally, I like the definition given by forum user Fleshj27: “If I’ll go [up it] threatened by fists or clubs, it’s scrambling. If I refuse to go up it without a gun at the back of my head, it’s climbing.”
Scrambling is considered a clean-rock activity. If a slope is covered in snow or ice, it is best ascended using mountaineering techniques. If covered in trees, a slope is best ascended using a very, very technical method called “tree-pulling.”
What Are Rock Scrambling Grades?
There are two popular grading scales for scrambling: the US and the UK scales. Note that the grades do not indicate safety or commitment, merely technical difficulty.
- Grade 1 UK/Grade 2 YDS: A route in which hands may be required for balance but no technical skill or rope is necessary.
- Grade 2 UK/Grade 3 YDS: A route in which hands are required for balance and semi-technical skills may be necessary. Good fitness is essential. A rope or handline may be employed for amateur scramblers.
- Grade 3 UK/Grade 4 YDS: A route in which sustained, technical moves requiring balance and strength are required. Climbers of all levels may prefer a rope, although easy Class 4’s are often ascended without any protection equipment.
- Grade 5 YDS: While some scrambles are rated “easy” Class 5’s (5.0 – 5.4), these should really be regarded as solo rock climbs. Any fall on Class 5 terrain will likely result in death or severe injury.
Where Are the Best Scrambling Trails in the US?
Northeastern US
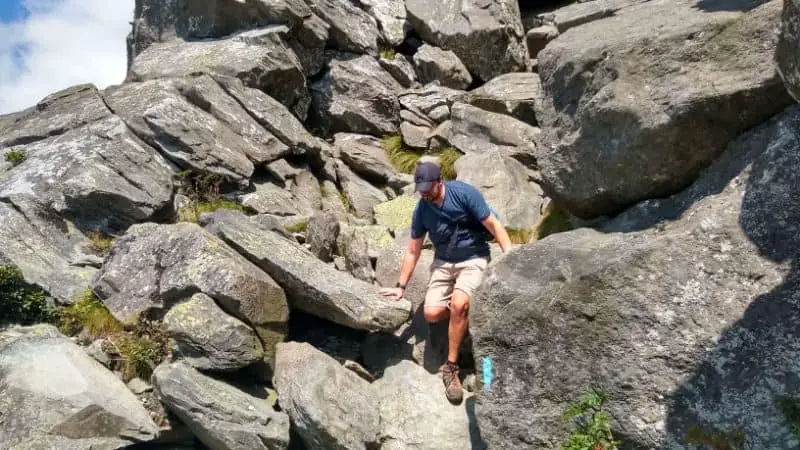
- In the northeastern U.S., most scrambles are naturally found at the rocky pinnacles of the broken-down Appalachians, like the Devil’s Stairs in the Catskills, or the avalanche-scoured slabs of the White Mountains and the Adirondacks. This generally involves friction climbing on high-angle terrain, and the biggest challenge is avoiding all the moss and lichen.
Mountain West US
- In the western U.S., scrambles are naturally found in the boulder and talus fields of the high-elevation Rockies, such as Longs Peak and Cottonwood Canyon in Colorado. You’ll also find great scrambling in the intermountain west, such as West Slabs of Mt. Olympus in the Wasatch Mountains of Utah. And lastly, some incredible European-style ridge scrambling is found on knife-edge traverses in the Sierra Nevada.
Southwestern US
- In the southwestern U.S., some of the best scrambling is associated with slot canyons and desert summits, such as Angel’s Landing and South Guardian Angel in Zion National Park and the slot canyons of Escalante National Monument. And there’s a lifetime’s worth of backcountry scrambling hidden in the outback of Nevada, Arizona, and parts of west Texas. Most scrambling is on sandstone, which requires careful balance and good weather.
Southeastern US
- In the southeastern U.S., several less committing scrambles can be found along the spines of Appalachian subranges, such as Grandfather Mountain in North Carolina and Old Rag in Virginia. For more information, visit my Know Before You Go Guide about rock scrambling in the Eastern United States!
Midwest US
- Unfortunately, there are very few classic scrambles in the Midwest. Most technical terrain, such as Devil’s Lake State Park in Wisconsin or Horseshoe Canyon Ranch in Arkansas, are all bluffs and require a rope and technical rock climbing equipment.
There are many, many other hotspots for scrambling, including the Pacific Northwest Cascades, the Canadian Rockies, and the Grand Tetons.
For other classic scrambling routes and trails, you can check out forums like MountainProject.com and SummitPost.org. I also recommend the grassroots guide, “40 Classic Scrambles of North America” by Sean O’Rourke.
4 Essential Skills for Rock Scrambling
1. Route Finding
Scrambling is, by definition, off-trail. There are no climbing bolts, no blazes, no painted arrows. Many scrambles require bushwacking to access the base of the climb or to descend, and many scrambles inconveniently end in the middle of a mountain face. You should be familiar with maps, GPS’s, compasses, and the other trappings of macro route-finding.
2. Excellent Fitness
Scrambling is a mano-a-mano adventure with the mountain. The importance of being able to self-rescue cannot be overstated. And the first line of defense in the mountains is your physical fitness. Scrambling involves thousands of partial one-legged squats. Neither hiking nor climbing will prepare you for the punishment. Scrambling requires more pain tolerance than its recreational cousins, hiking and cragging.
3. Head for Exposure
Some scrambles take place in mountain couloirs and gullies where the climbing may be hard but the exposure is limited. Other relatively “easy” scrambles may be along knife-edge traverses and 2,000-ft drops. All scrambling requires comfort at heights, but know your limits and your preferences.
4. Rope Skills
As you become a more accomplished scrambler, you will need to learn backcountry rope skills like building natural anchors and setting a rappel. Even if you don’t plan to use these skills in the backcountry, you may need them to self-rescue or protect your partner.
10 Tips for Safe Rock Scrambling

- Wear the right shoes. Most scrambles are best attempted in low-cut approach shoes with sticky rubber soles. Keep your laces short! Bonus points if the rubber stays sticky when wet, because you never know when a mountain shower could ruin your plans!
- Wear a helmet; bring a rope. As Andy Kirkpatrick says, “Where’s there’s rope, there’s hope!” At a bare minimum, bring a 20-meter dynamic climbing rope to set up a handline or an emergency belay. You’ll need a lightweight alpine harness and a handful of carabiners as well.
- Shrink your pack. Scrambling is a balance sport, and nothing ruins balance faster than a heavily loaded backpack. Wear a snug dayback and pack heavy items close to your body. If you bring trekking poles, they should be collapsible; you won’t be able to use them on most high-angle terrain.
- Don’t bounce-test every foot placement. Nervous scramblers and climbers often bounce, scuff, and reposition every foothold to mentally reassure themselves. Don’t do
- Know your limits. SAR teams commonly rescue amateur hikers attempting scrambles in the White Mountains, the Adirondacks, Longs Peak, Zion, Half Dome,
- Don’t climb anything you can’t come down. Going down is typically more difficult than going up. Never commit to a technical route if you’re not 100% sure you can walk off, rappel, butt-scoot, or somehow get your way back down.
- Maintain 3 points of contact. Slips can and will happen. Whenever possible, maintain three points of contact with the rock at all times. Trust your feet first and your hands second.
- Test suspect handholds. Just a few months ago I was scrambling up a 20-ft headwall in the Trape Dike rated 5.4-5.5. I reached for a corner block, squeezed, and the block popped off the face like a wine bottle cork. Thankfully, I saved myself, but remember – rock will break when you least expect it!
- Watch the weather. Most rock types will become more brittle and more slippery when wet. For me, even a 30% chance of a shower is high enough to shut down routes on many friction slabs.
- Tell someone where you’re going and when you’ll be back. Better yet, bring a friend. Otherwise, who will take a picture of your death-defying exploits? No one will believe it …
